Deploying your own Sweep instance via Docker
🎉 We recently changed our license to the Elastic License V2 to allow Sweep for commercial usage.
Video Guide
1. Setting up the GitHub App (5 min)
We created an app using npm to make it easier to set up the GitHub App. If you do not have it installed, install it here (opens in a new tab). If you would like ot set it up yourself, scroll down to the Manual GitHub App Setup section.
First, open a terminal and run the following commands:
git clone https://github.com/sweepai/sweep
cd sweep/self_deploy
npm install
npm start
Second, open http://localhost:3000 (opens in a new tab) in your browser, and:
- Click the "Register GitHub App" button.
- Click the green "Create GitHub App for USERNAME" button.
- Pick where to install the app and then click the green "Install" button. This will take you to the app settings page.
- Click the small "App settings" button.

Now, stop the server by pressing Ctrl+C in the terminal. Once it has stopped, run the following command:
cat .envYou should see something like this:
WEBHOOK_PROXY_URL=https://smee.io/abcdefg
APP_ID=123456
PRIVATE_KEY="-----BEGIN RSA PRIVATE KEY-----\n...\n-----END RSA PRIVATE KEY-----\n"
WEBHOOK_SECRET=213921898f9as8f92139128989f
GITHUB_CLIENT_ID=Iv1.123218f182131
GITHUB_CLIENT_SECRET=6g626312b212142132121321412
Keep this terminal open, we will need the PRIVATE_KEY and APP_ID later:
APP_ID=123456
PRIVATE_KEY="-----BEGIN RSA PRIVATE KEY-----\n...\n-----END RSA PRIVATE KEY-----\n"
2. OpenAI API Token
Please create an OpenAI API token at https://platform.openai.com/account/api-keys (opens in a new tab). You will need this later. Also, if you have access to the 32k model, please set OPENAI_DO_HAVE_32K_MODEL_ACCESS=true. If you have a beefier machine and want higher quality search, change the sentence transformers model to sentence-transformers/all-mpnet-base-v2.
OPENAI_API_KEY=sk-xxxxxxxxxxxxxxxxxxxxxxxxxxxxxxxxxxxxxxxxxxxxxxx
OPENAI_DO_HAVE_32K_MODEL_ACCESS=false
SENTENCE_TRANSFORMERS_MODEL=sentence-transformers/all-MiniLM-L6-v2
3. Deploying Sweep
Starting here it gets more involved so if you run into issues, please reach out to us on Discord (opens in a new tab) or open a GitHub issue (ironic, we know!) at https://github.com/sweepai/sweep/issues (opens in a new tab). We are online, please ping us @kevin, @william, and @luke.
As Sweep is Dockerized, you can deploy this anywhere but for this guide, we will deploy it on Digital Ocean for simplicity. If you would like to run it locally, you can follow the section in the dropdown at the bottom of this guide.
First, click the following:

1. Skip Resources Page
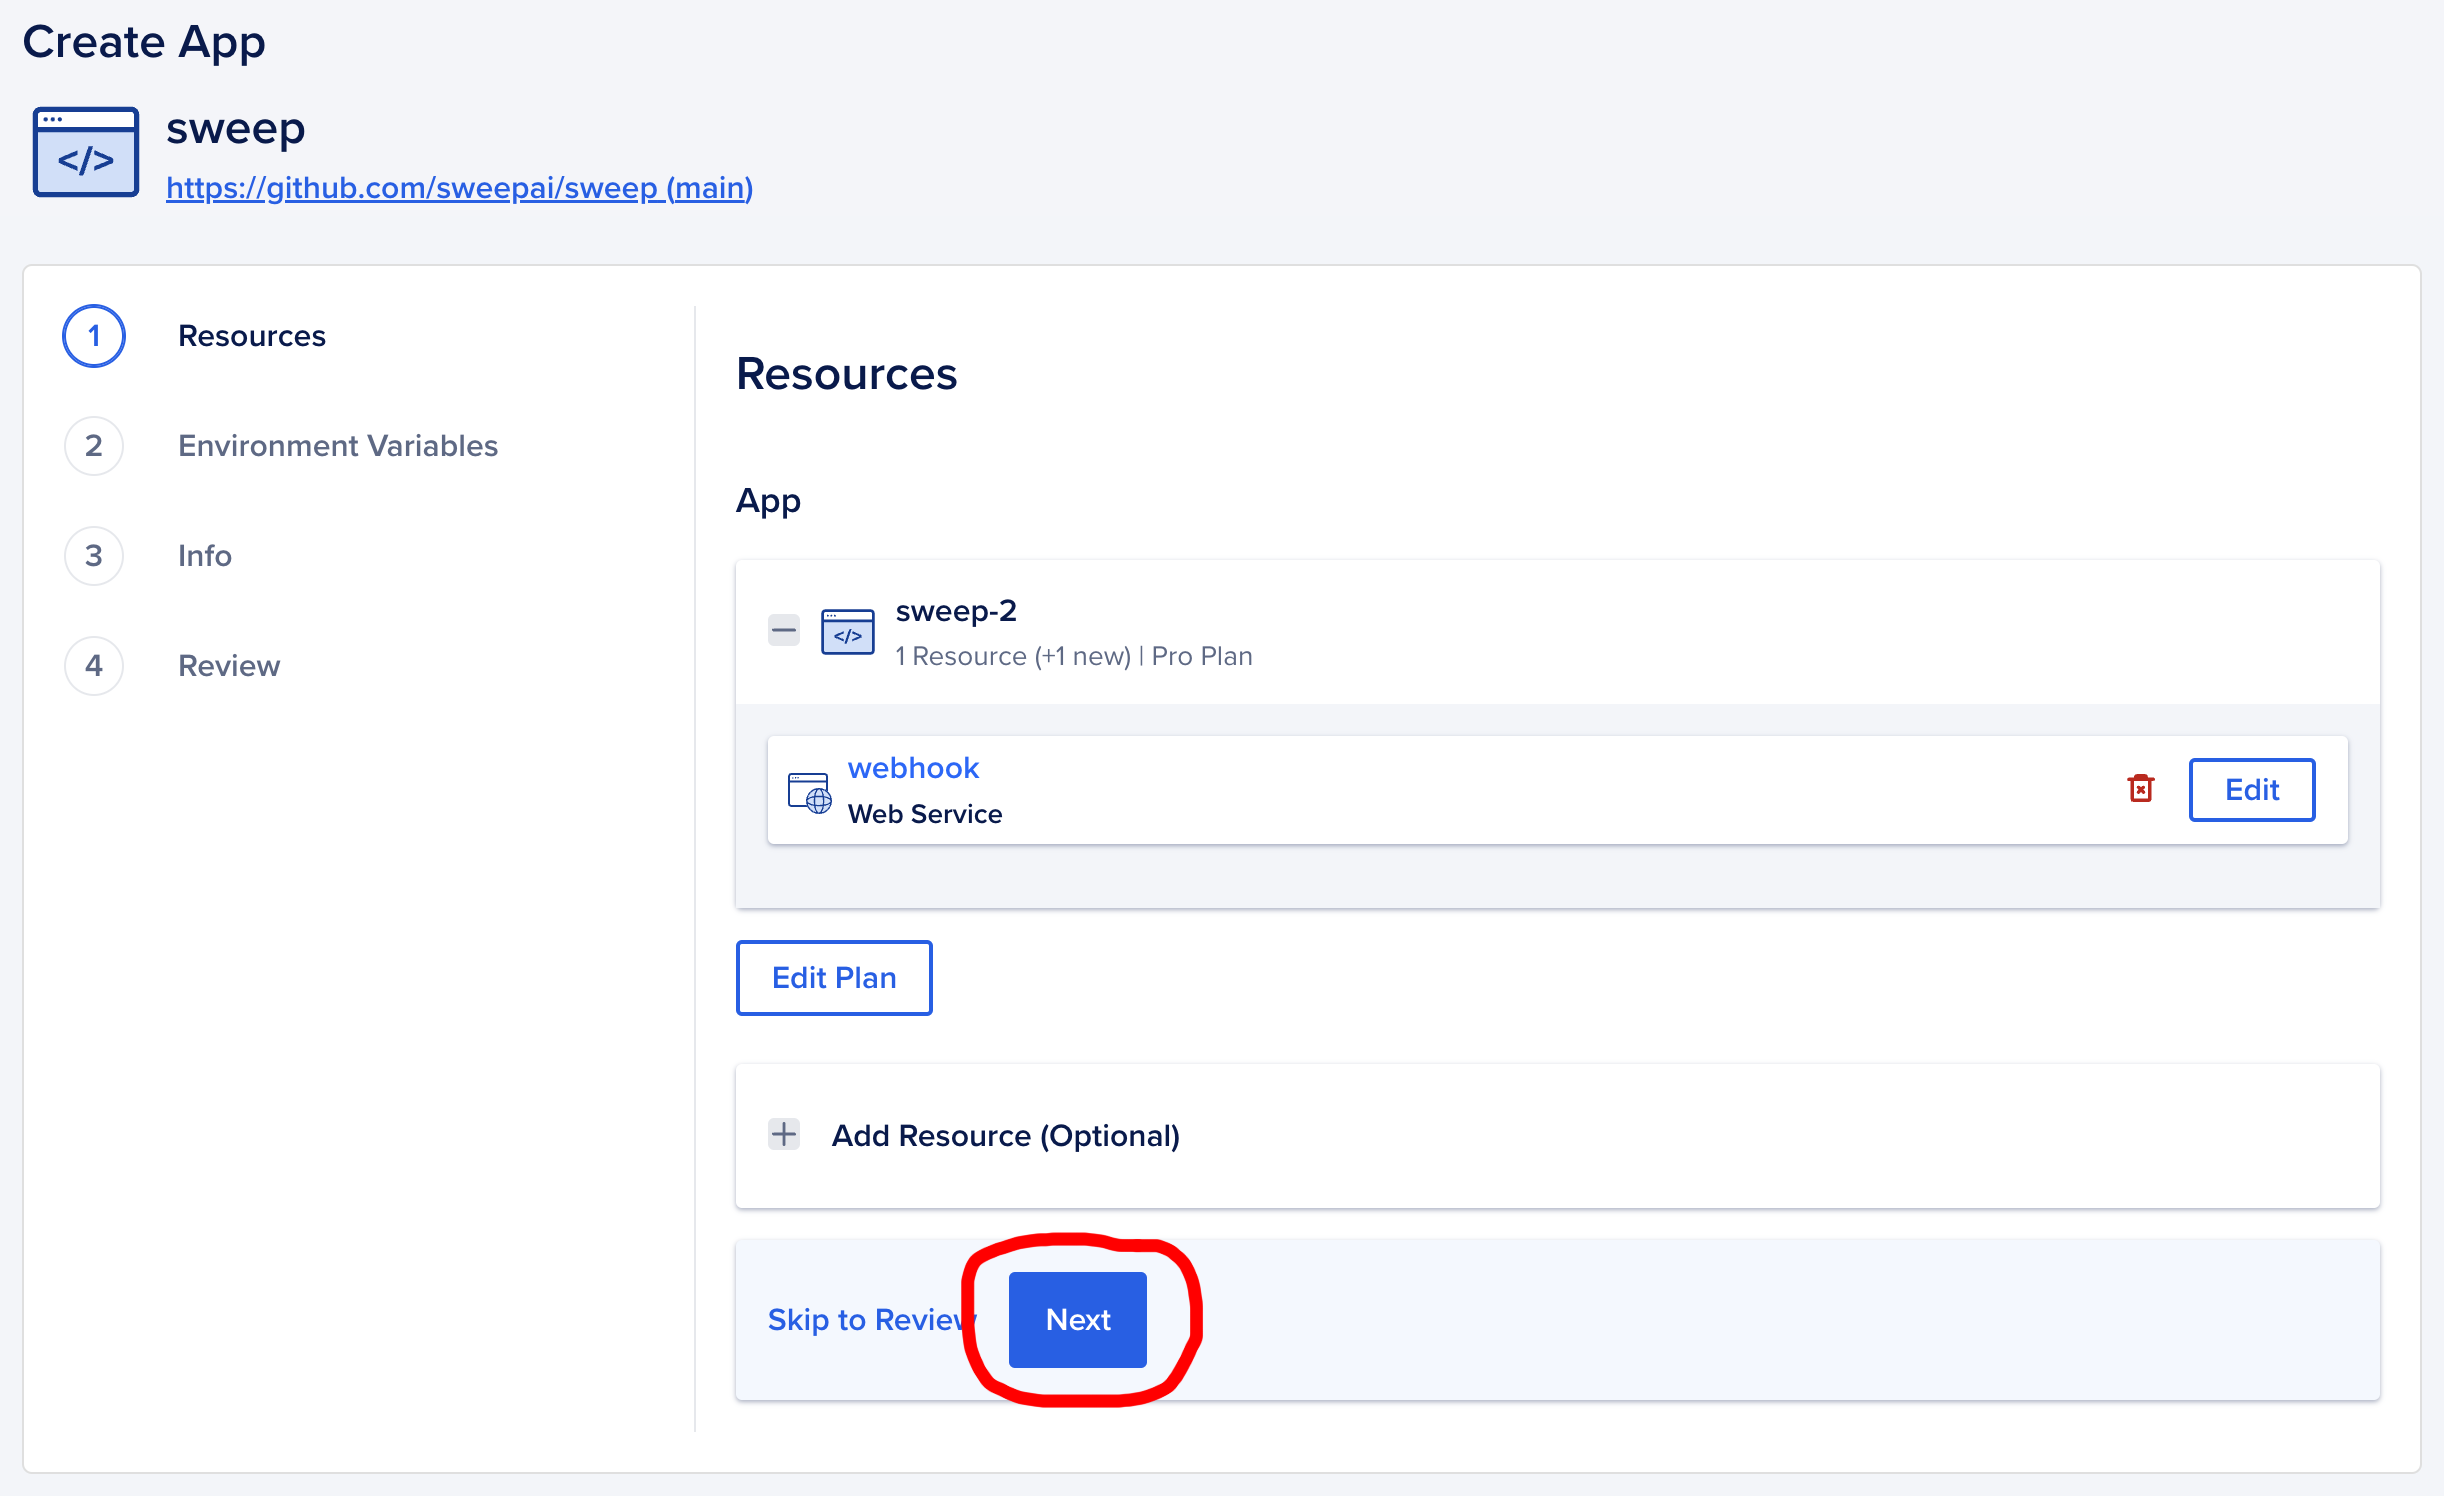
2. Set Environment Variables
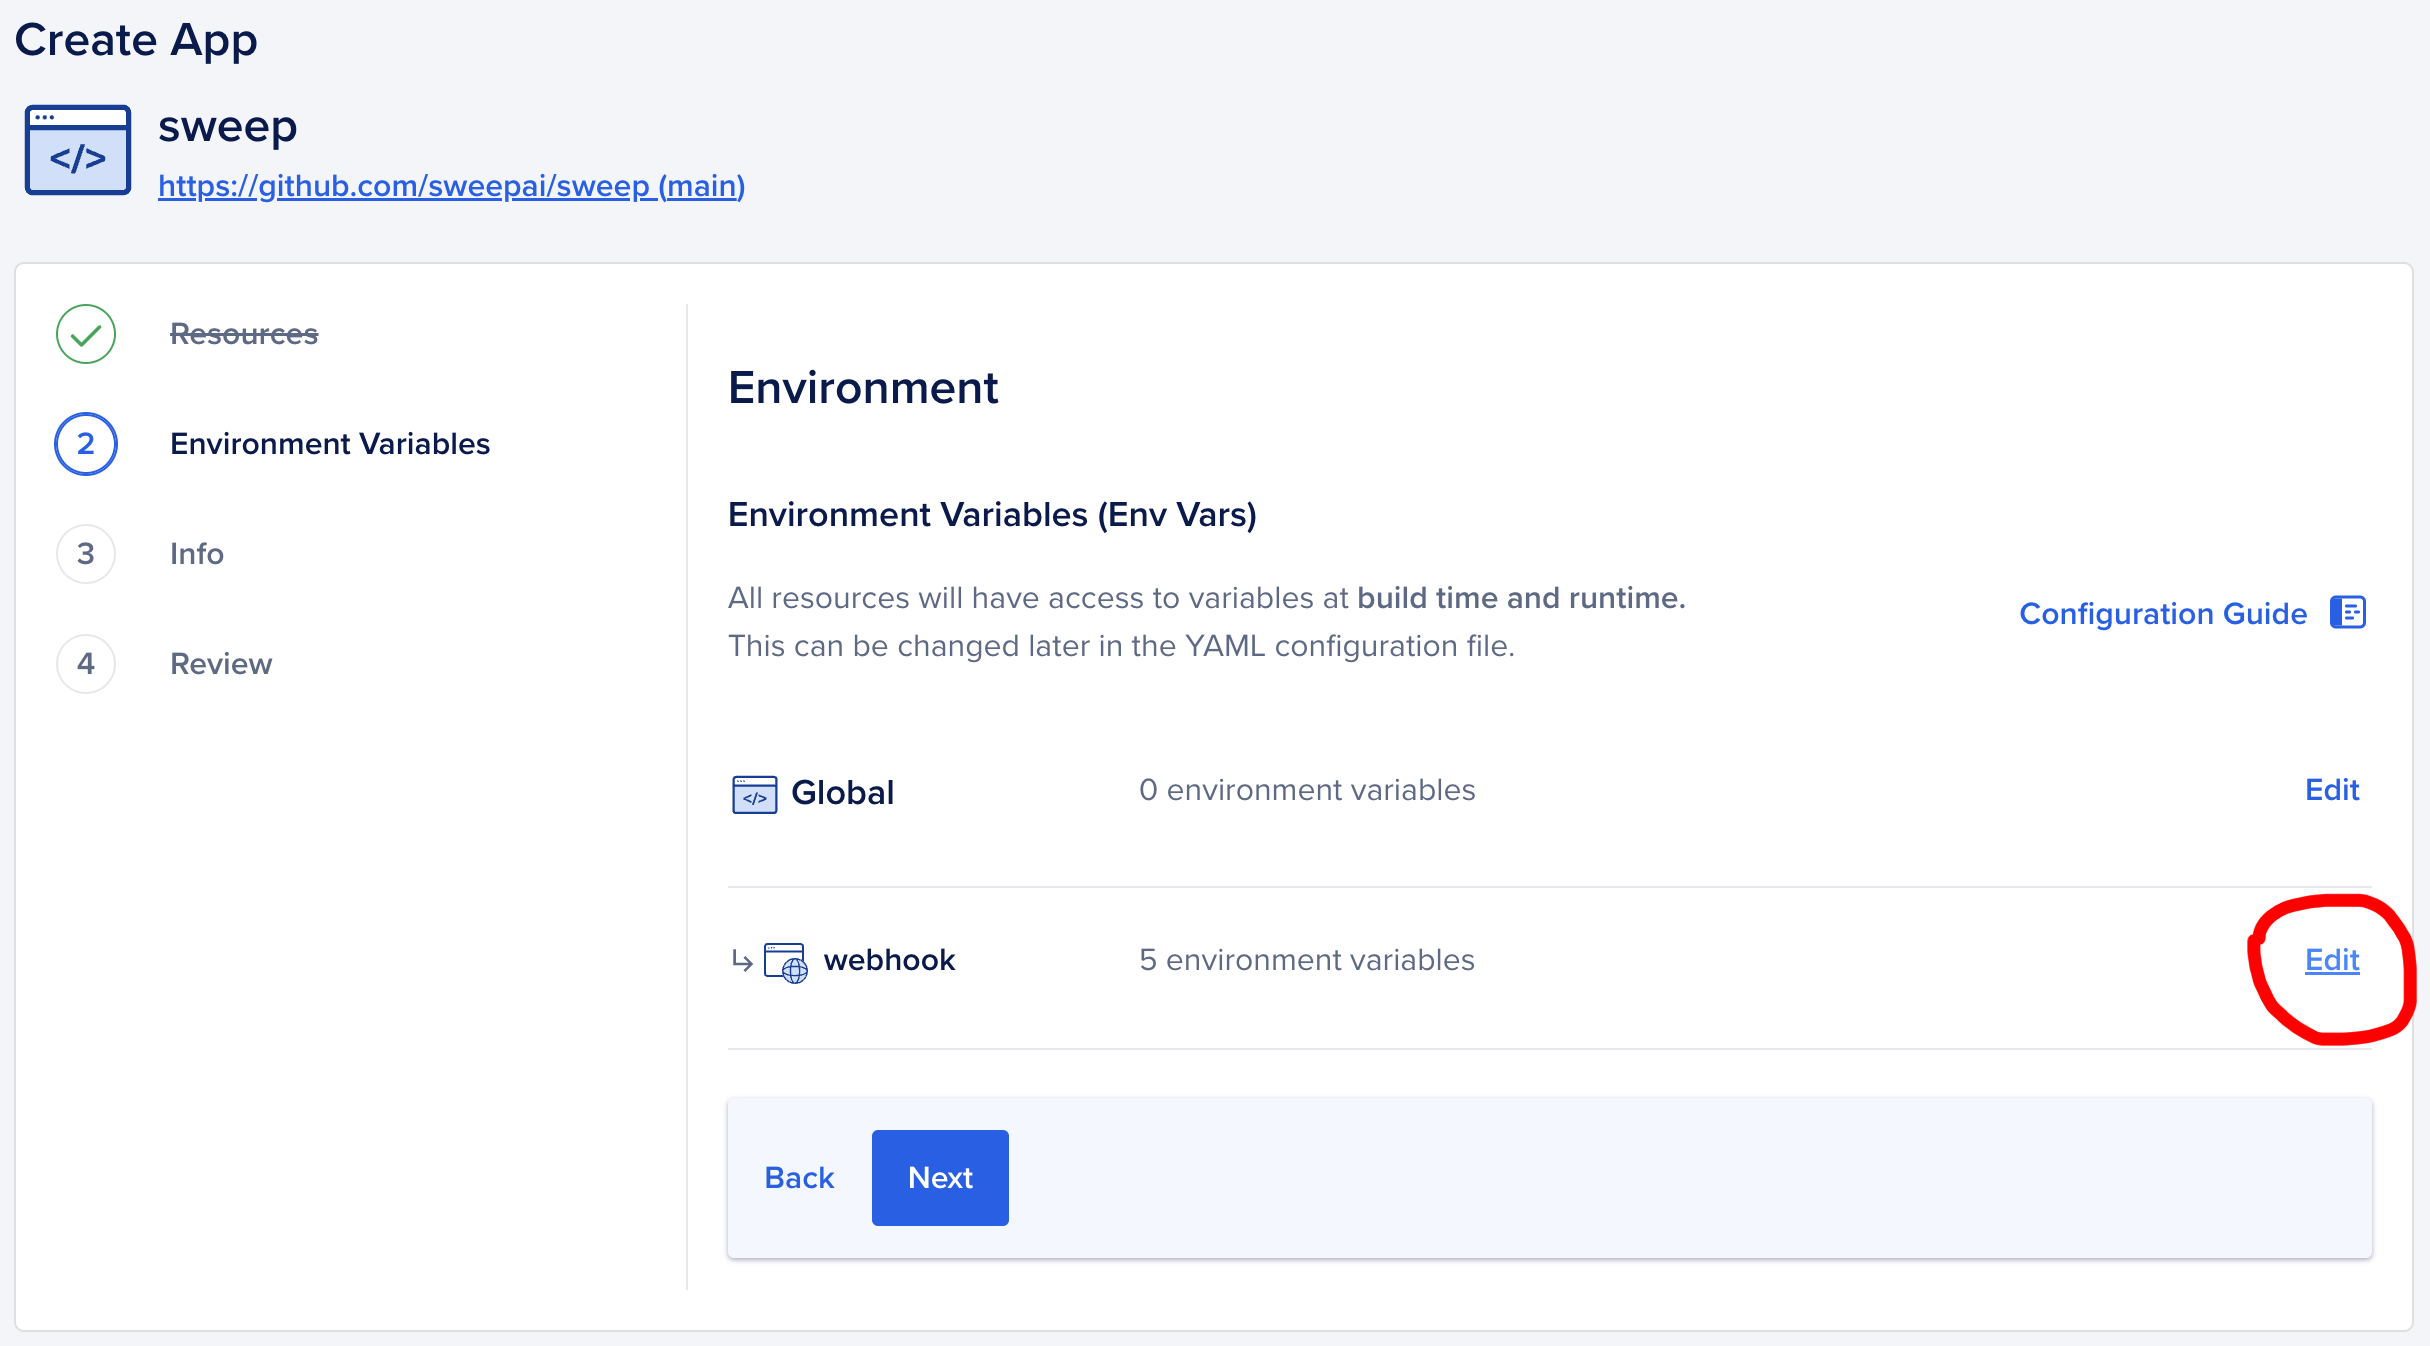
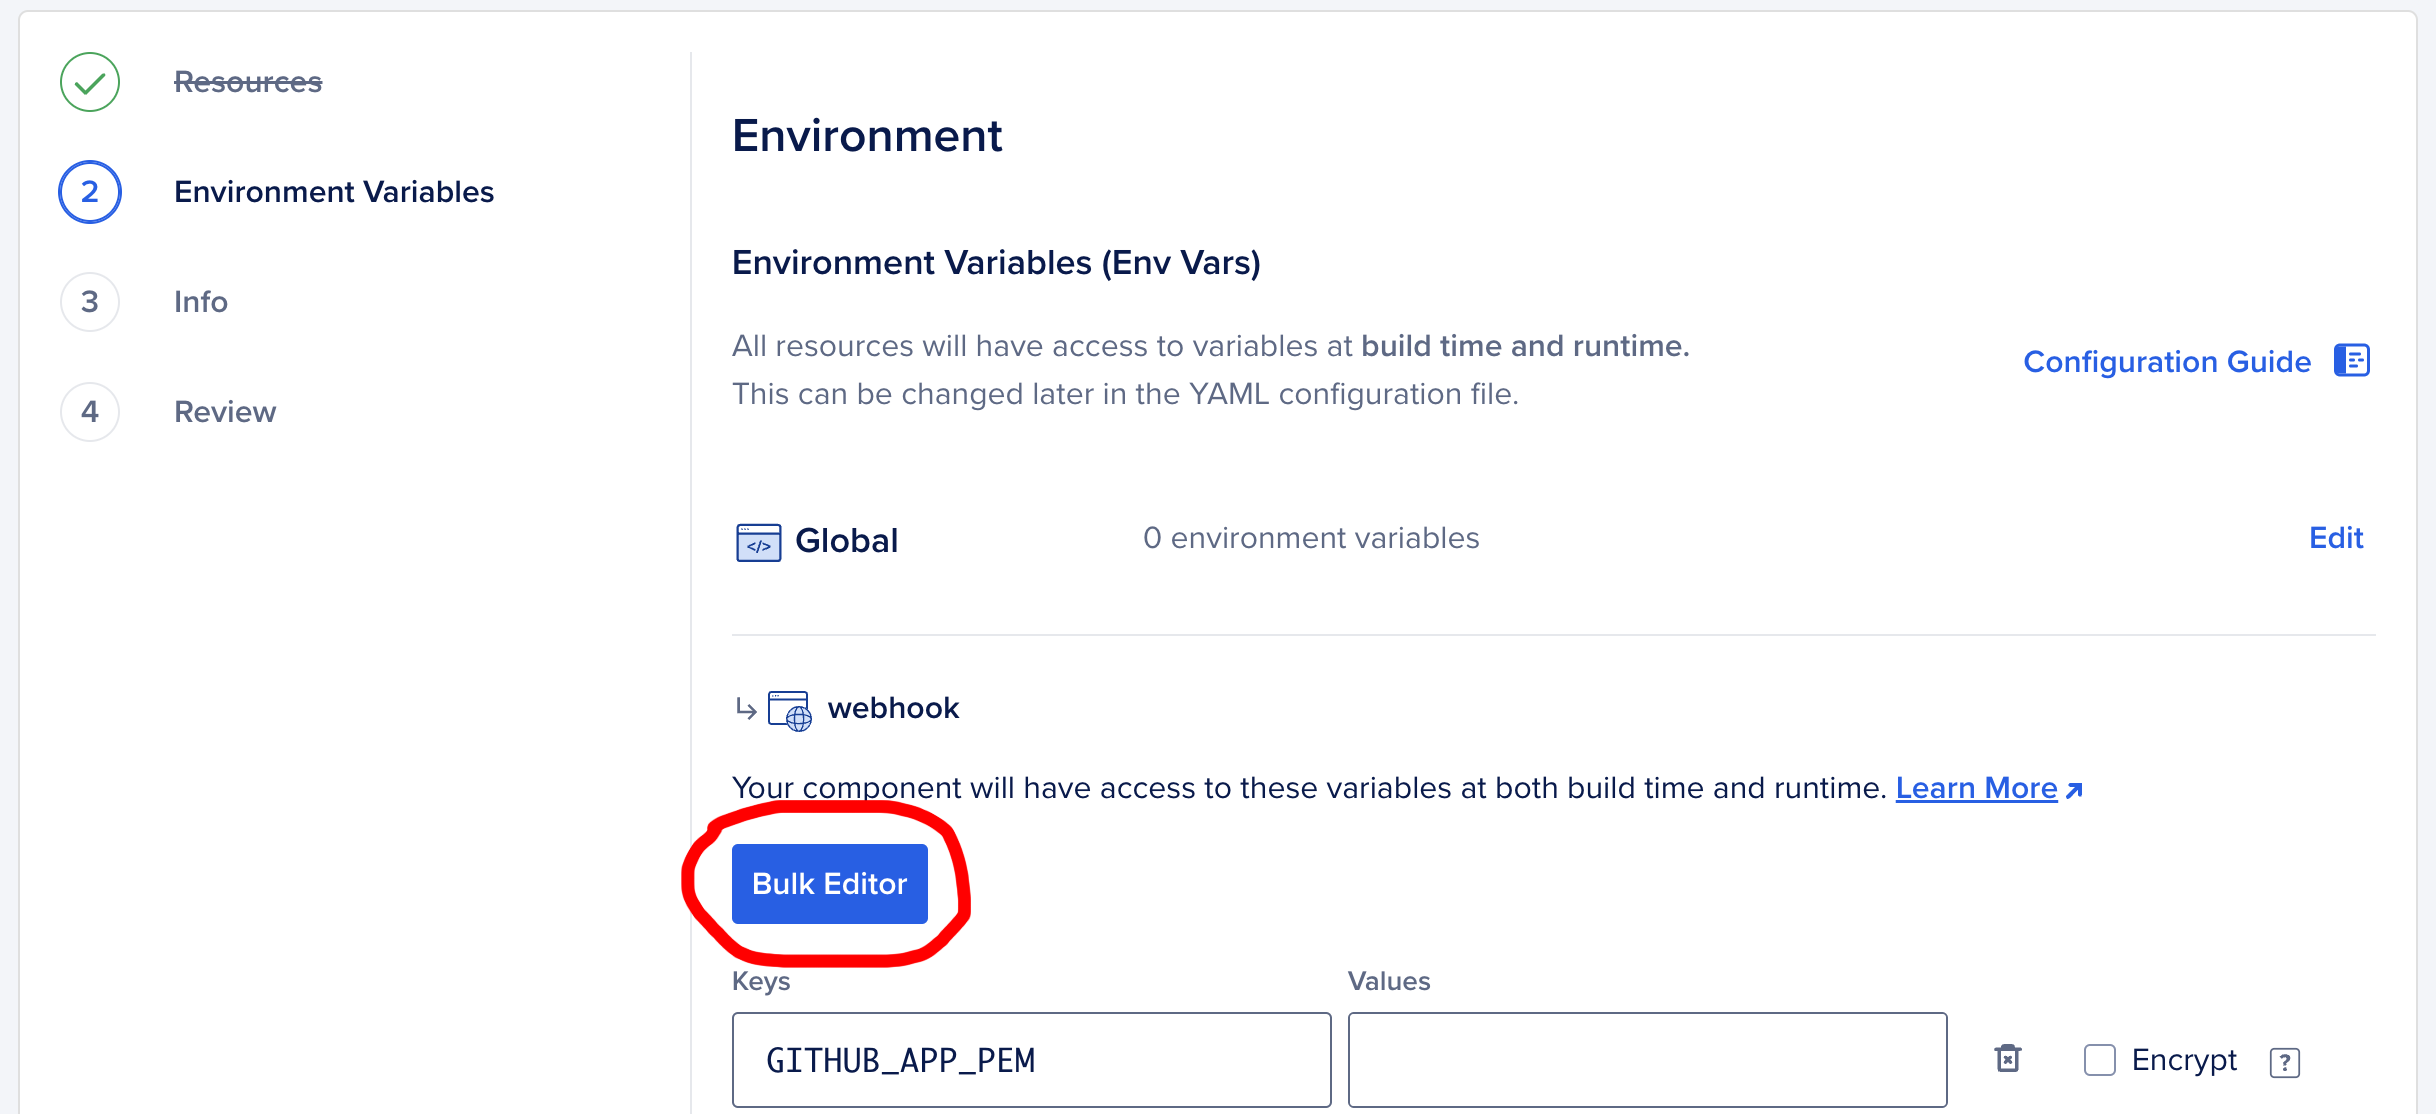
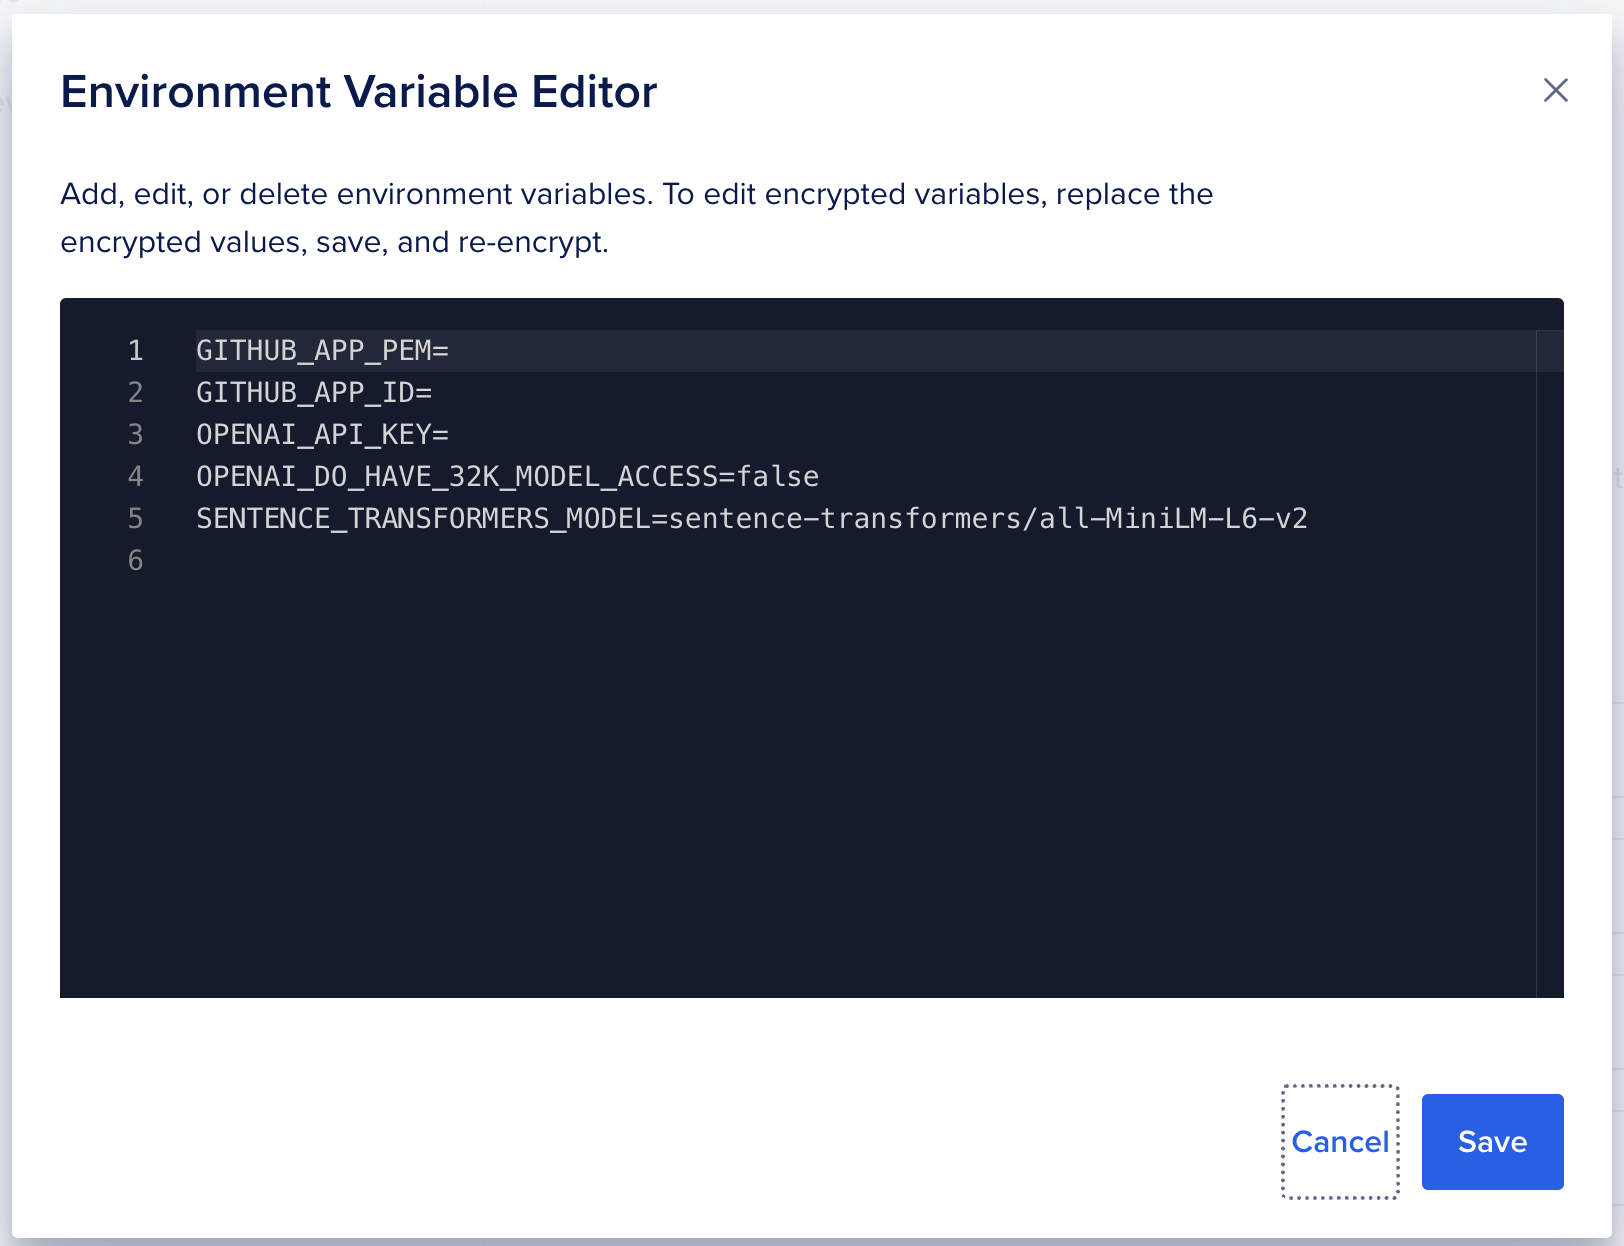
In the Environment Variable Editor, copy and paste the environment variables from above like so:
# These two are from step 1. Rename PRIVATE_KEY to GITHUB_APP_PEM
APP_ID=1234
GITHUB_APP_PEM="-----BEGIN RSA PRIVATE KEY-----\n...\n-----END RSA PRIVATE KEY-----\n"

# These three are from step 2.
OPENAI_API_KEY=sk-xxxxxxxxxxxxxxxxxxxxxxxxxxxxxxxxxxxxxxxxxxxxxxx
OPENAI_DO_HAVE_32K_MODEL_ACCESS=false
SENTENCE_TRANSFORMERS_MODEL=sentence-transformers/all-MiniLM-L6-v2
Click Save to close the Bulk Editor, then click Save again to save the varaibles.
It is important that you click save twice, otherwise the variables will not be saved.
3. Info
Modify any information as needed, then click Next.
4. Review: Update Instance Resource Size
First, click Edit Plan in the Billing section.
Then, set the Instance Size.
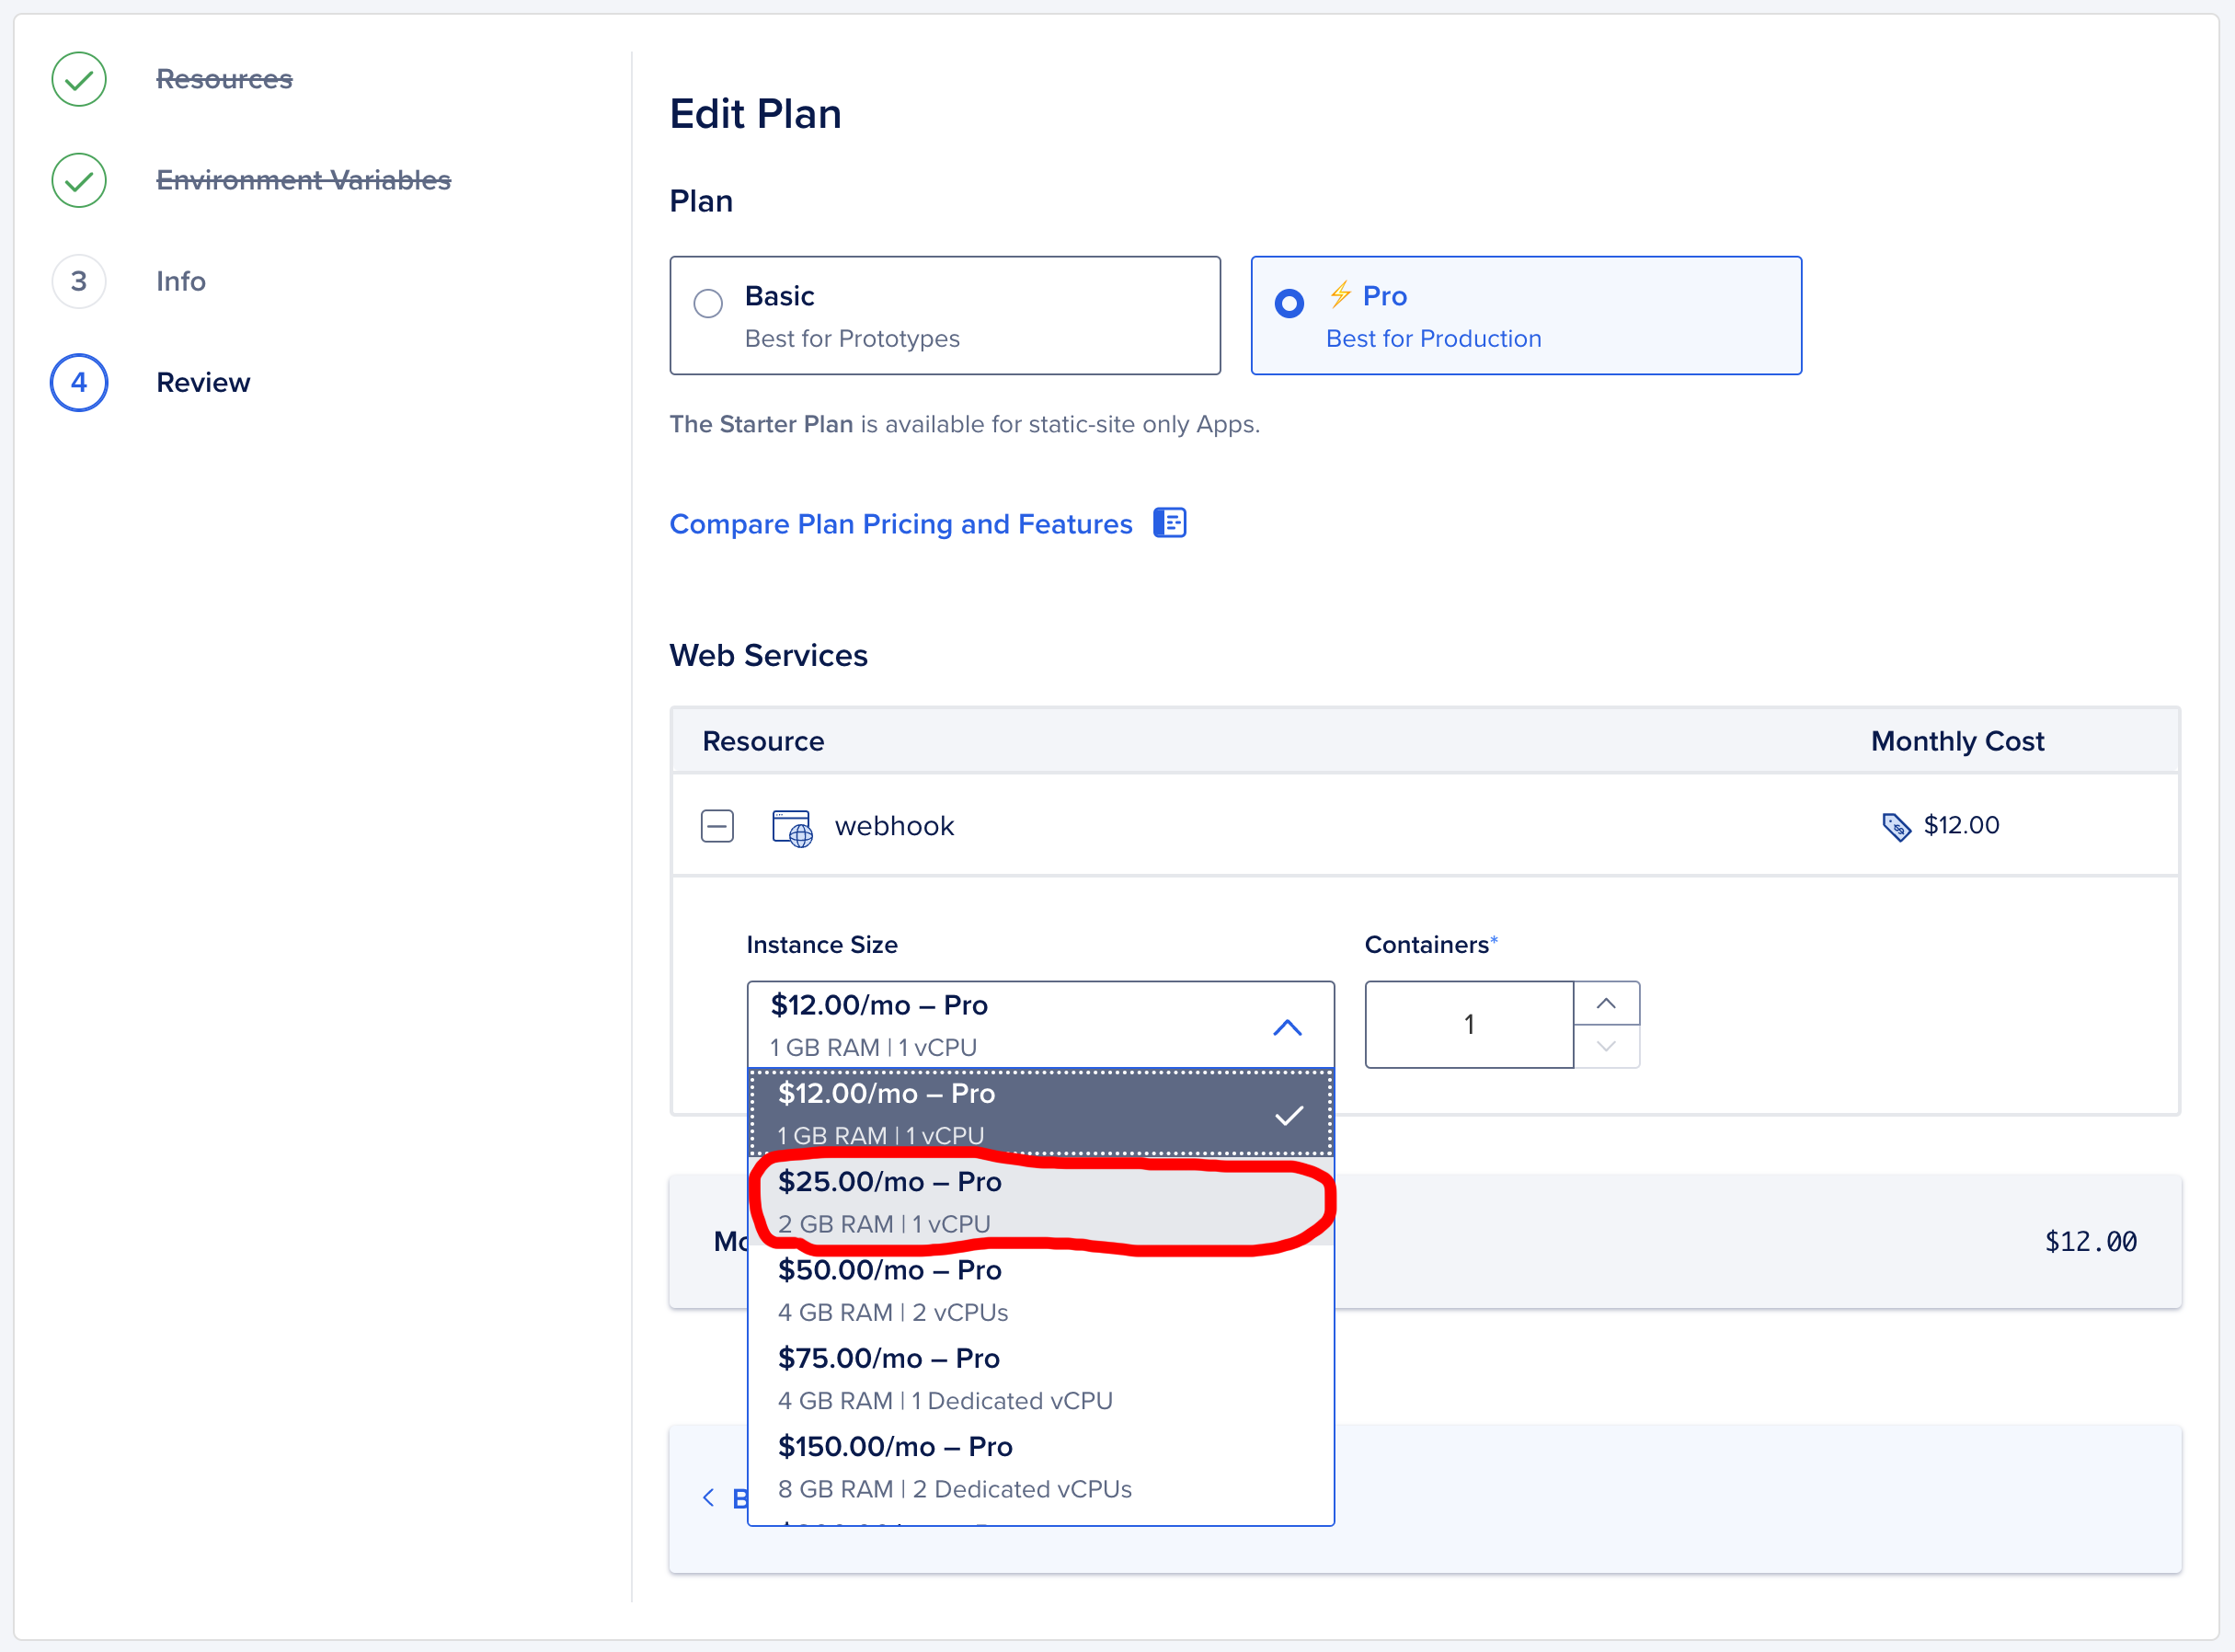
Please select an instance with at least 2 GB RAM. The default 1 GB RAM instance will not work.
5. Create Resources!
6. Set Webhook URL in GitHub
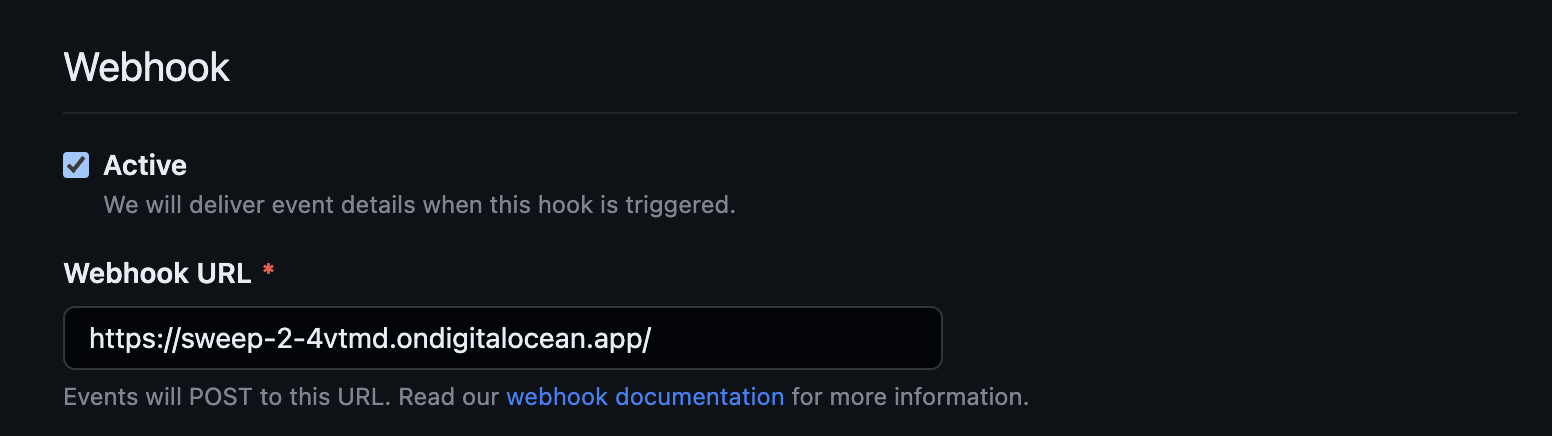
Once the resource is created, you should get a link like this:
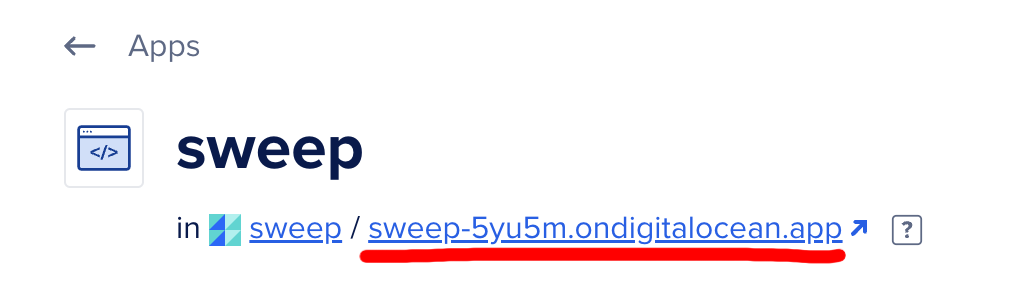
Navigating to this link should look like this:

- Copy this link to your clipboard.
- Go to your GitHub App and paste this link into the
GeneraltabWebhook URLfield. Ensure SSL verification remains active.
4. Using Sweep (1 min)
Finally, you can use Sweep by creating a new issue with a title prefixed with Sweep:, like Sweep: add comments to BaseIndex.tsx and watch the magic happen!
For more details on using Sweep, see our tutorial (opens in a new tab) and advanced usage (opens in a new tab) guides.
Alternate steps:
Alternative to 1: Manual GitHub App Setup
Option B: Manual Setup (15 min)
Register a new GitHub App, following this guide (opens in a new tab) (3 minutes). You should return here after step 16(it's not as bad as it seems, most steps are optional).
Use the below as a reference:
Set the Repository Permissions (7 selected):
| Scope | Permissions |
|---|---|
| actions | read |
| checks | read |
| contents | read & write |
| commit statuses | read & write |
| issues | read & write |
| metadata | read |
| pull requests | read & write |
| workflows | read & write |
| Subscribe to events |
|---|
| check run |
| check suite |
| commit comment |
| create |
| issue comment |
| issues |
| label |
| pull request |
| pull request review |
| pull request review comment |
| pull request thread |
| push |
| status |
| workflow job |
| workflow run |
Put a placeholder url for now (ex: https://github.com/sweepai/sweep/ (opens in a new tab)).
Generate a private key (it should prompt you at the top of the screen, or alternatively follow this guide (opens in a new tab)) and save it for later. This is your private-key.pem for step 2.

You will also need your app ID, which is the number at the top of the page. This is your app-id for step 2.

Click Install App to install it on your account or organization. Point it to a repo which you want to use Sweep on. This repo cannot be empty. If you don't have a good repo at hand, check out our tutorial on running Sweep on Docusaurus (opens in a new tab).
Alternative to 3: Deploying Locally
If you do not want to deploy on the cloud and would prefer to deploy on your local machine, you can do so by following the steps below.
You need to install Docker (opens in a new tab) to host Sweep.
Pull our image from Docker Hub:
docker pull sweepai/sweep:latestIt may take 5-10 minutes to download the image and you can move on to the next step while it's downloading.
Create a .env file with the contents from steps 1 and 2. Then in the same directory, run:
docker run --env-file .env -p 8080:8080 sweepai/sweep:latestWe're going to use Ngrok (opens in a new tab) for a reverse proxy.
Sign up for an Ngrok account and install the CLI from https://dashboard.ngrok.com/signup (opens in a new tab). Your terminal must be in the same directory as your ngrok installation. Start the reverse proxy with ./ngrok http 8080. The second last line should say something like
Forwarding https://4d8d8bf053be.ngrok.app -> http://localhost:8080Then proceed with step 4.
There's additional configurable settings like Redis caching and GPU-accelerated embeddings that we use for our hosted product that we can document further for self-hosting. If this interests you please contact us at https://discord.gg/sweep (opens in a new tab).